728x90
SMALL

먼저 코드로 구현하기 때문에
스토리보드를 삭제
https://explorer89.tistory.com/13
main storyboard (메인 스토리보드) 삭제하는 방법
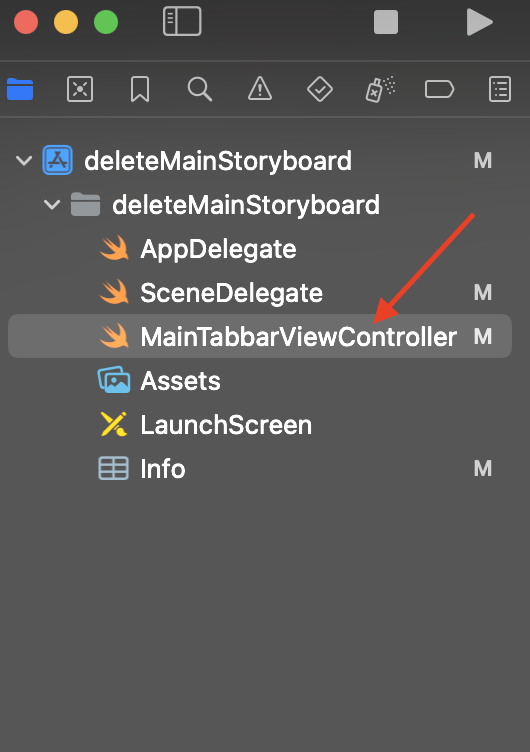
먼저 프로젝트를 하나 생성 폴더명 표시줄에 "Main" 파일을 삭제 ("Main" 파일을 선택한 뒤 백스페이스로 파일 삭제 -> 이 때 Move to Trash 선택) info 파일을 선택한 뒤에 화살표가 가리키는 파일 삭제 "c
explorer89.tistory.com
ViewController 내 파일 명과 내부 코드를 다음과 같이 작성
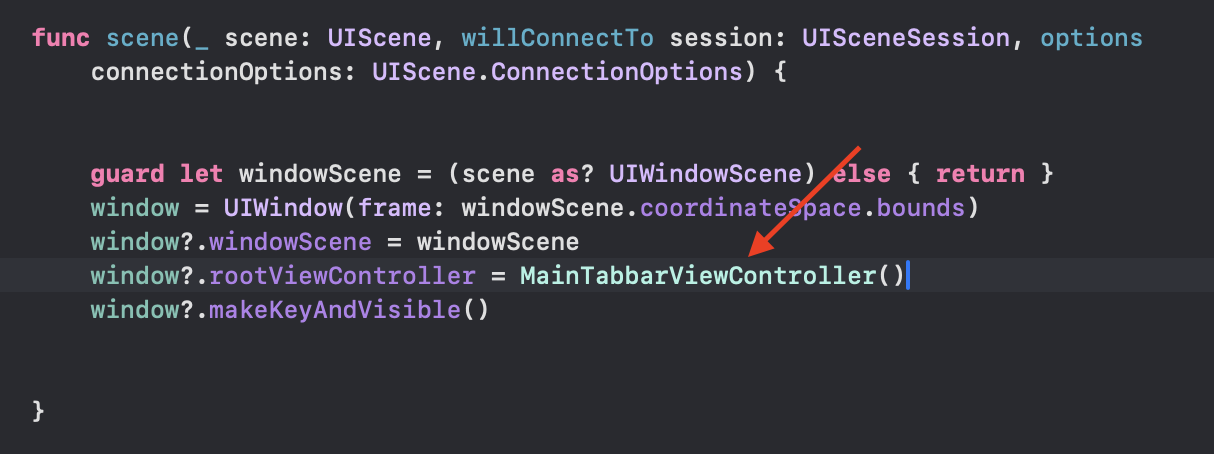
SceneDelegate 파일 내에서 "willConnectTo" 의 함수에서 rootViewController에
위에 작성한 파일명으로 할당
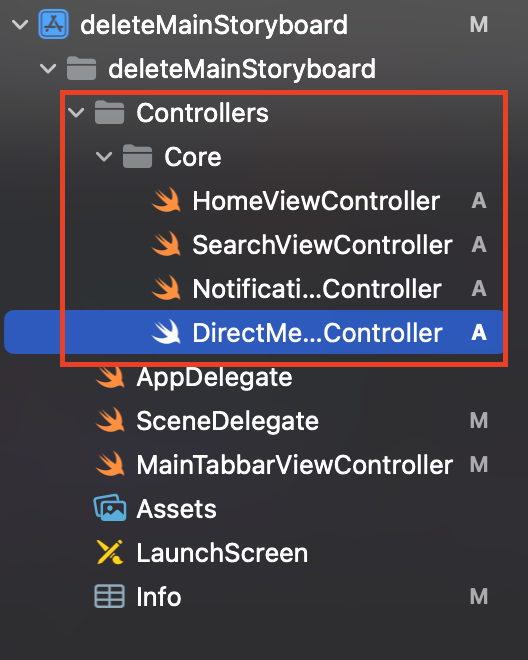
프로젝트 트리에서 새 폴더와 새 파일을 추가
파일은 "Cocoa Touch Class" 을 사용하여, "ViewController" 형식으로 생성
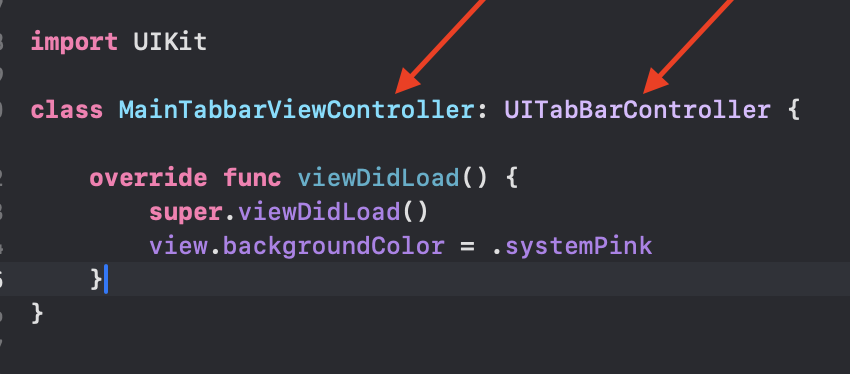
MainTabbarViewController 파일 내에 아래 코드 작성
import UIKit

class MainTabbarViewController: UITabBarController {

    override func viewDidLoad() {
        super.viewDidLoad()
        view.backgroundColor = .systemBackground

        let vc1 = UINavigationController(rootViewController: HomeViewController())
        let vc2 = UINavigationController(rootViewController: SearchViewController())
        let vc3 = UINavigationController(rootViewController: NotificationViewController())
        let vc4 = UINavigationController(rootViewController: DirectMessageViewController())


        vc1.tabBarItem.image = UIImage(systemName: "house")
        vc1.tabBarItem.selectedImage = UIImage(systemName: "house.fill")

        vc2.tabBarItem.image = UIImage(systemName: "magnifyingglass")

        vc3.tabBarItem.image = UIImage(systemName: "bell")
        vc3.tabBarItem.selectedImage = UIImage(systemName: "bell.fill")

        vc4.tabBarItem.image = UIImage(systemName: "envelope")
        vc4.tabBarItem.selectedImage = UIImage(systemName: "envelope.fill")


        setViewControllers([vc1, vc2, vc3, vc4], animated: true)

    }
}
시뮬레이터를 통해 확인
728x90
LIST
'UIKIT' 카테고리의 다른 글
| 네비게이션컨트롤러 및 네비게이션바 (0) | 2024.01.18 |
|---|---|
| BMI 계산기 (화면 전환 및 데이터 전달) (0) | 2024.01.16 |
| 화면 이동과 데이터 전달 1편 (0) | 2024.01.14 |
| ViewController의 라이프 사이클 (1) | 2024.01.10 |
| main storyboard (메인 스토리보드) 삭제하는 방법 (1) | 2024.01.09 |


