728x90
SMALL
import UIKit
import SDWebImage

class FullScreenImageViewController: UIViewController {

    // MARK: - UI Components
    private let imageView: UIImageView = {
        let imageView = UIImageView()
        imageView.contentMode = .scaleAspectFit
        imageView.clipsToBounds = true
        return imageView
    }()

    private let closeButton: UIButton = {
        let button = UIButton()
        button.setImage(UIImage(systemName: "xmark.circle.fill"), for: .normal)
        button.tintColor = .white
        return button
    }()

    // MARK: - Properties
    private var images: [String] = []
    private var currentIndex: Int = 0

    // MARK: - Initializer
    init(images: [String], currentIndex: Int) {
        self.images = images
        self.currentIndex = currentIndex
        super.init(nibName: nil, bundle: nil)
        self.modalPresentationStyle = .fullScreen
    }

    required init?(coder: NSCoder) {
        fatalError("init(coder:) has not been implemented")
    }

    // MARK: - Lifecycle
    override func viewDidLoad() {
        super.viewDidLoad()
        setupViews()
        setupConstraints()
        updateImage()

        // Add swipe gestures
        let swipeLeft = UISwipeGestureRecognizer(target: self, action: #selector(handleSwipe(_:)))
        swipeLeft.direction = .left
        let swipeRight = UISwipeGestureRecognizer(target: self, action: #selector(handleSwipe(_:)))
        swipeRight.direction = .right

        view.addGestureRecognizer(swipeLeft)
        view.addGestureRecognizer(swipeRight)
    }

    // MARK: - Setup
    private func setupViews() {
        view.backgroundColor = .black
        view.addSubview(imageView)
        view.addSubview(closeButton)
        closeButton.addTarget(self, action: #selector(didTapClose), for: .touchUpInside)
    }

    // MARK: - Layouts
    private func setupConstraints() {
        imageView.translatesAutoresizingMaskIntoConstraints = false
        closeButton.translatesAutoresizingMaskIntoConstraints = false

        NSLayoutConstraint.activate([
            imageView.topAnchor.constraint(equalTo: view.topAnchor),
            imageView.bottomAnchor.constraint(equalTo: view.bottomAnchor),
            imageView.leadingAnchor.constraint(equalTo: view.leadingAnchor),
            imageView.trailingAnchor.constraint(equalTo: view.trailingAnchor),

            closeButton.topAnchor.constraint(equalTo: view.safeAreaLayoutGuide.topAnchor, constant: 16),
            closeButton.trailingAnchor.constraint(equalTo: view.trailingAnchor, constant: -16),
            closeButton.widthAnchor.constraint(equalToConstant: 30),
            closeButton.heightAnchor.constraint(equalToConstant: 30)
        ])
    }

    // MARK: - Actions
    @objc private func didTapClose() {
        dismiss(animated: true, completion: nil)
    }

    @objc private func handleSwipe(_ gesture: UISwipeGestureRecognizer) {
        if gesture.direction == .left {
            currentIndex = (currentIndex + 1) % images.count
        } else if gesture.direction == .right {
            currentIndex = (currentIndex - 1 + images.count) % images.count
        }
        updateImage()
    }

    // MARK: - Helper Methods
    private func updateImage() {
        let imageUrl = images[currentIndex]

        let securePosterURL = imageUrl.replacingOccurrences(of: "http://", with: "https://")

        let url = URL(string: securePosterURL)
        imageView.sd_setImage(with: url)
    }
}
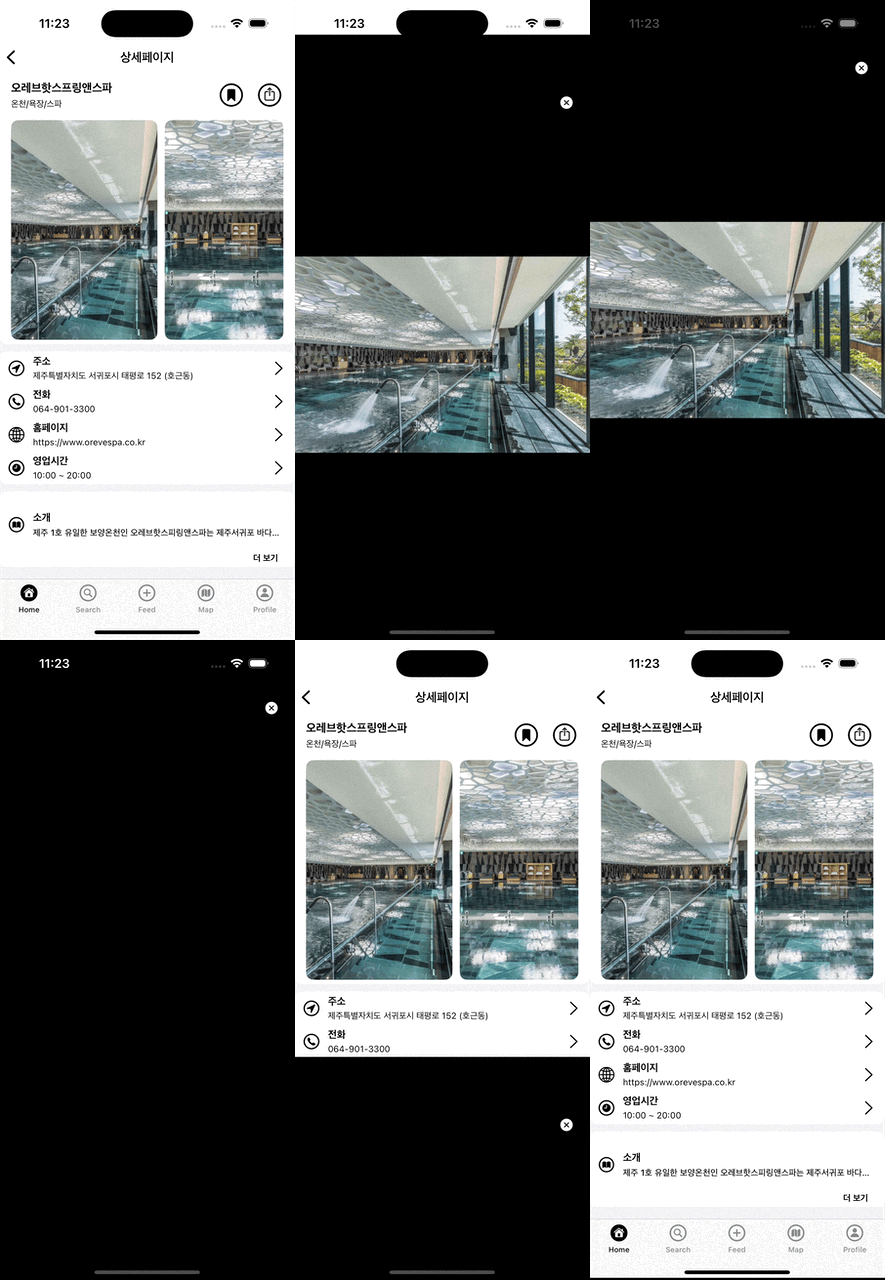
여기서 handleSwipe 함수를 좀 보면 좋을 것 같습니다.
이 코드는 UISwipeGestureRecognizer를 사용하여 화면에서 좌우로 스와이프하는 제스처를 처리하는 함수입니다. 각각의 스와이프 방향에 따라 현재 보여주는 이미지를 업데이트합니다.
구체적으로:
- gesture.direction == .left: 사용자가 화면을 왼쪽으로 스와이프했을 때,
- currentIndex 값을 1 증가시킵니다.
- 이미 배열의 끝에 도달하면 (currentIndex + 1) % images.count에서 모듈로 연산을 통해 currentIndex를 0으로 설정하여 첫 번째 이미지로 돌아가게 만듭니다.
- gesture.direction == .right: 사용자가 화면을 오른쪽으로 스와이프했을 때,
- currentIndex 값을 1 감소시킵니다.
- 배열의 처음에 도달하면 (currentIndex - 1 + images.count) % images.count에서 모듈로 연산을 사용하여 마지막 이미지로 돌아가게 합니다.
- updateImage(): currentIndex 값이 변경된 후, 이 함수는 새로운 currentIndex에 해당하는 이미지를 화면에 업데이트합니다.
이 방식으로 사용자는 화면에서 좌우로 스와이프하여 이미지 배열을 순환하며 볼 수 있습니다.
그리고 해당 컬렉션뷰의 델리게이트 함수에서 아래와 같이 사용합니다.
    func collectionView(_ collectionView: UICollectionView, didSelectItemAt indexPath: IndexPath) {
        let fullScreenVC = FullScreenImageViewController(images: detailImages, currentIndex: indexPath.item)
        present(fullScreenVC, animated: true)
    }

728x90
LIST
'UIKIT' 카테고리의 다른 글
| UISearchBar 사용하기 (0) | 2024.10.26 |
|---|---|
| 나중에 꼭 해봐야할 "공유" 기능 -> UIActivityViewController (3) | 2024.10.24 |
| ViewController 에서 init을 통해 데이터를 전달하는 방식이 깔끔한 이유 (0) | 2024.10.22 |
| JSON에서 받아온 homepage 데이터는 HTML 태그 제거 (1) | 2024.10.22 |
| 테이블에 3개씩 끊어서 데이터를 더보기 해주는 방법 (0) | 2024.10.21 |


